You’ve been accepted!
After you’ve received your acceptance and you and your parent/guardian have signed off on the “Parental Permission Form” and “Financial Responsibility Agreement,” you’ll gain access to the “Course Selection Form” within your Precollege Portal.
Review course selection deadlines
See the Precollege residential, online and commuter course selection deadlines for summer courses.
See the Precollege online course selection deadlines for winter courses.
Explore course options by program
How to Select Your Courses
Go to the “Course Selection Form” within your Student Portal
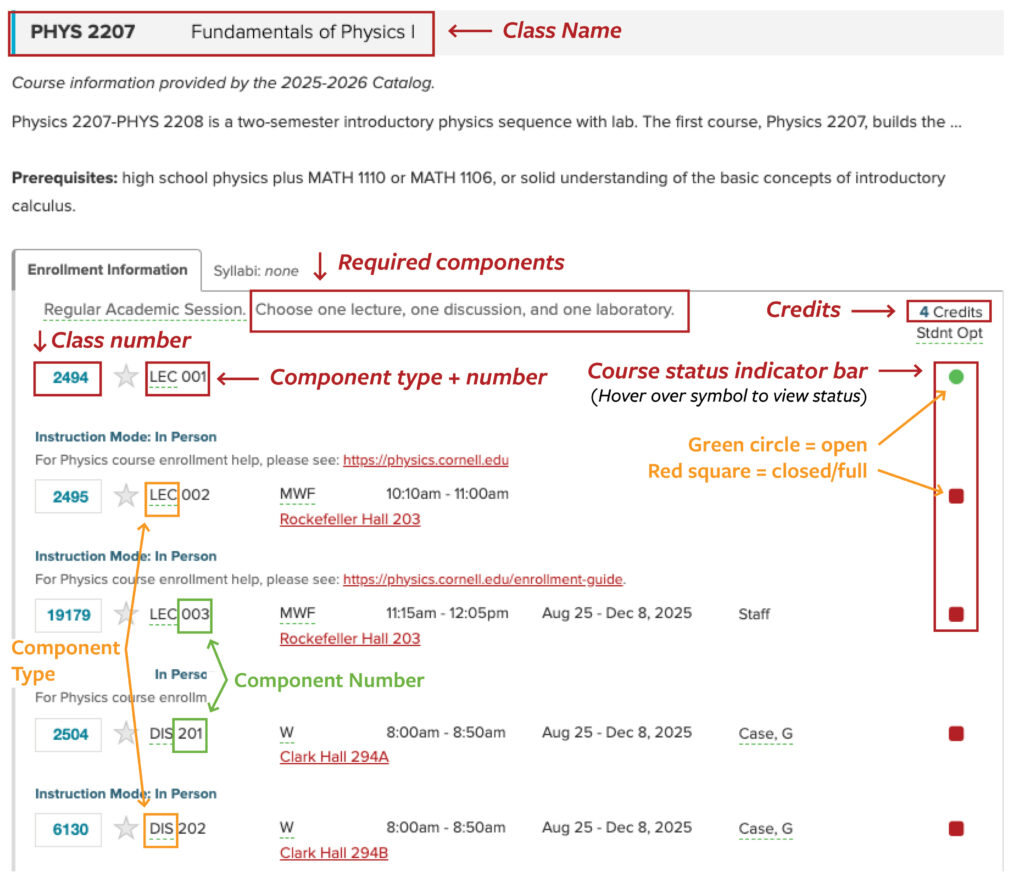
On that form, you’ll enter the following information for each course you’ve selected:
- Class name
- Credits
- Class number
- Component number
Finding the required course information on the roster
Annotated roster example of where to find the required course information.
Keep in mind
- You may combine online and on-campus courses from different sessions.
Combining courses
Depending upon your eligibility, you may be able to
- Combine courses from different summer sessions
For example, combine an on-campus course from Three-week session 2 with an on-campus course from Three-week session 3 for a six-week program. - Combine an online course with an on-campus course (as long as they are not in the same session)
For example, combine an online course from Three-week session 1 with an on-campus course from Three-week session 2. (Note: You may not reside on campus while taking an online class.) - Combine courses in the same field (for in-depth study) or from different or complementary fields (to explore your options)
For example, combine a humanities course from Three-week Session 2 with a science course from Three-week Session 3 for a six-week cross-disciplinary program.
Exceptions: You may not combine a course from three-week session 2 or 3 with a six-week session course.
Before considering a combination program, be sure to review individual course descriptions for eligibility requirements and prerequisites, and check application deadlines.
- You’ll be asked to select preferred (first-choice) and alternate (back-up) courses. If your preferred course is full, you’ll be enrolled in your alternate course instead.